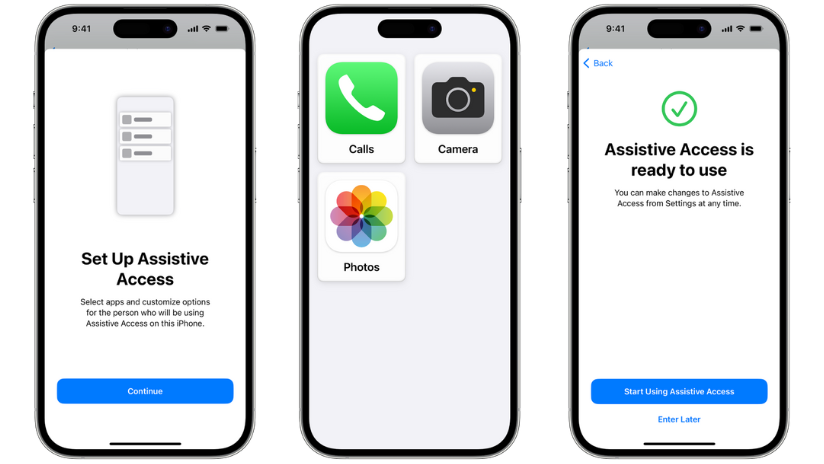
How to set up an iPhone for an elderly relative using Assistive Access
If you’ve ever headed home for a long-weekend, you’ll know what it’s like being bombarded with questions on your tech rom older relatives. It can be tricky to teach elderly relatives how to navigate something as complex as an iPhone, so here’s a way to make it easier. It’s called Assistive Access and it’s built right into iOS.

What is Assistive Access in iOS?
Assistive Access is a feature within iOS that simplifies the interface of iPhones and iPads. It focuses on essential functions like making calls, sending messages, taking photos, and using apps, making them more straightforward and less overwhelming.
This feature is particularly beneficial for users who find the standard iOS interface too complicated, including elderly individuals.
Why Assistive Access is good for your less tech-savvy relatives
- Simplified Interface: Assistive Access reduces clutter and simplifies navigation, which is ideal for seniors who may find the standard interface confusing.
- A Safe Sandbox: You can customise the interface to include only the essential apps and functions your elderly relative needs, removing unnecessary distractions.
- Larger Icons and Text: The feature allows for larger icons and text, making it easier for users with visual impairments to see and use their device.
- Enhanced Focus: By reducing the number of available options, Assistive Access helps users focus on the primary tasks they want to accomplish, such as calling family members or checking messages.
How to set up Assistive Access for an elderly relative
Setting up Assistive Access on an iPhone or iPad is straightforward. Here’s a step-by-step guide to help you set it up for your elderly relative the next time they want help:
Before you start: Update to the Latest iOS Version
Ensure the iPhone or iPad is running the latest version of iOS. To check for updates:
- Go to Settings.
- Tap General.
- Select Software Update.
- If an update is available, tap Download and Install.
Step 1: Start the Assistive Access Setup
- Open the Settings app.
- Navigate to Accessibility.
- Select Assistive Access.
- Tap Set Up Assistive Access, then tap Continue.
Step 2: Verify the Apple ID
- Make sure the displayed Apple ID belongs to the person using the iPhone.
- If the Apple ID is incorrect, tap Change Apple ID, sign out, and then sign in with the correct Apple ID. Create a new Apple ID if needed.
- After making any changes, return to Settings > Accessibility > Assistive Access.
Step 3: Select the App Layout
- Decide how the apps will be arranged on the Home Screen.
- Rows: Displays apps in an easy-to-read list format.
- Grid: Displays larger apps arranged in a grid, emphasizing images and icons.
Step 4: Add and Customise Apps
- Add apps optimised for Assistive Access or any other essential apps.
- Tap the Add button to include an app and customize it as needed.
- Common apps to add: Calls, Camera, Messages, Music, Photos.
- You can always add, remove, and customise apps later.
Step 5: Verify the Device Passcode
- Ensure the user knows the device passcode, which is used to unlock the iPhone.
- Set up Face ID or Touch ID for easier access if available.
- To modify security settings, tap Change Security Settings. Return to Settings > Accessibility > Assistive Access after making changes.
Step 6: Set the Assistive Access Passcode
- Create a passcode for entering and exiting Assistive Access.
- Enter the Apple ID and password for additional security, allowing passcode reset if necessary.
Step 7: Get to know how to Exit Assistive Access
- To exit Assistive Access, triple-click the side button (for iPhones with Face ID) or the Home button (for other models).
- Enter the Assistive Access passcode to return to the standard iPhone interface.
Step 8: Get started!
- To start using Assistive Access immediately, tap Start Using Assistive Access and enter the passcode.
- To activate it later, go to Settings > Accessibility > Assistive Access and tap Start Assistive Access.
Check out Apple’s page on Assistive Access for more information if you’re curious.
